Drip irrigation has revolutionized the way we water our gardens, landscapes, and food plots. Unlike traditional watering methods, a drip irrigation system delivers water directly to the plant roots, minimizing waste and maximizing efficiency. With growing concerns about water conservation and the need for sustainable gardening, more homeowners and urban farmers are turning to drip irrigation as their watering solution of choice. Whether you want to save time, reduce your water bill, or help your plants thrive, installing a drip irrigation system is an investment that pays off in many ways.
In this comprehensive guide, you'll learn what makes drip irrigation so effective, how to plan your system, step-by-step installation instructions, and tips for getting the most from your setup. We'll also compare drip irrigation to other watering methods to help you make an informed decision. Let’s dive into the details and transform the way you care for your garden.
The Advantages of Drip Irrigation Systems
Drip irrigation systems offer several distinct benefits over traditional watering methods like sprinklers or manual hose watering. Here are some of the most compelling reasons gardeners and landscapers are switching to drip systems:
1. Water Efficiency: Drip irrigation can reduce water usage by 30-50% compared to traditional sprinkler systems. According to the Environmental Protection Agency (EPA), conventional sprinklers can waste up to 50% of water through evaporation and runoff, while drip systems deliver water only where it’s needed. 2. Healthier Plants: By delivering water directly to the root zone, drip irrigation reduces the risk of fungal diseases and leaf scorch that can result from overhead watering. 3. Weed Reduction: Because water is targeted to plant roots, surrounding soil remains drier, inhibiting weed seed germination. 4. Time Savings: Automated drip systems can be set with timers, allowing you to water your garden without daily manual effort. 5. Flexibility: Drip irrigation works well for gardens of all sizes, from small vegetable beds to extensive flower borders and even container plants.These benefits make drip irrigation an excellent choice for anyone looking to optimize their garden’s water usage and health.
Planning Your Drip Irrigation System
Successful installation begins with careful planning. Before purchasing materials or digging in, follow these steps to design a system that fits your garden’s unique needs:
1. Assess Your Garden Layout: Sketch a simple map of your garden beds, rows, or planting areas. Mark where each plant or group of plants is located. Note different watering needs—vegetables, flowers, and shrubs may each require different amounts of water. 2. Measure the Area: Use a tape measure to determine the length and width of each bed or planting area. This information will help calculate how much tubing, connectors, and emitters you’ll need. 3. Identify Your Water Source: Drip systems can connect to a standard outdoor faucet, a rain barrel, or a dedicated irrigation line. Make sure your water pressure (typically 20-40 psi for drip systems) is compatible. If it’s too high, a pressure regulator is essential. 4. Choose Drip Components: A basic drip irrigation system includes the following parts: - Mainline tubing (usually 1/2 inch diameter) - Drip emitters or inline drip tubing - Connectors and tees - Filter (to prevent clogging) - Pressure regulator - End caps or flush valves - Optional: Timers for automation 5. Calculate Watering Needs: Different plants require different amounts of water. For example, tomatoes need about 1-2 inches of water per week, while succulents require far less. Plan emitter spacing and flow rates accordingly.Planning ensures you purchase the right supplies and configure your system for maximum efficiency and plant health.
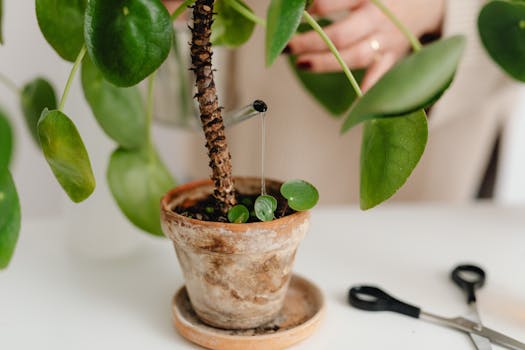
Step-by-Step Guide to Installing a Drip Irrigation System
Once your plan is in place and materials are gathered, you’re ready to install. Here’s a step-by-step breakdown:
1. Prepare the Area: Clear away mulch, rocks, or debris from planting beds so you can lay tubing close to the soil. 2. Assemble the Mainline: Connect the mainline tubing to your water source. If using a faucet, install a filter and pressure regulator first, then attach the tubing. 3. Lay Out Tubing: Run the mainline tubing along the length of your beds or rows. Use stakes or tubing holders to keep it in place. 4. Install Drip Emitters or Inline Tubing: For individual plants, punch holes in the mainline and insert drip emitters. For rows, use inline drip tubing with built-in emitters spaced at regular intervals (e.g., 12 or 18 inches). 5. Connect Branch Lines: Use tees or connectors to branch off the mainline and reach all planting areas. 6. Cap and Flush: Place end caps at the end of each tubing run. Before capping, turn on the water briefly to flush out debris. 7. Test the System: Turn on the water and check for leaks, clogs, or uneven flow. Adjust emitter placement or flow as needed. 8. Cover Tubing: Replace mulch or ground cover to protect tubing from sunlight and foot traffic, which can extend its lifespan. 9. Set Up a Timer: For maximum convenience, install a battery-operated or mechanical timer at the faucet.With careful installation and a test run, your plants will soon enjoy efficient, targeted watering.
Comparing Drip Irrigation to Other Watering Methods
How does drip irrigation stack up against other common watering methods? The table below highlights the main differences:
| Watering Method | Water Efficiency | Cost (Initial/Annual) | Labor Required | Plant Health Impact |
|---|---|---|---|---|
| Drip Irrigation | 90-95% | $50-$200 / $5-$20 | Low (with timer) | Excellent (root-level, less disease) |
| Sprinkler System | 60-70% | $100-$400 / $30-$60 | Medium | Good (overhead, higher disease risk) |
| Hand Watering | 40-50% | $10-$30 / $0 | High | Variable (depends on technique) |
| Soaker Hose | 70-80% | $25-$70 / $5-$15 | Medium | Good (can be uneven) |
As shown, drip irrigation is the most water-efficient method, offering long-term savings on both water and labor.
Customizing Your Drip System for Different Garden Types
Drip irrigation isn’t one-size-fits-all. Here are ways to customize your system to suit various garden types:
Vegetable Gardens: Use inline tubing with emitters spaced 12 inches apart for row crops. Tomatoes, peppers, and cucumbers benefit from dedicated emitters (1-2 gallons per hour) placed at their base.
Flower Borders: Use flexible tubing and adjustable emitters to accommodate different plant spacings and water needs. Flowers like zinnias or marigolds do well with 0.5-1 gallon per hour emitters.
Container Gardens: Micro-tubing (1/4 inch) with small emitters can be run to each pot. This is ideal for patio gardens and balconies.
Shrubs and Trees: Use higher-flow emitters (2-4 gallons per hour) and install multiple emitters around the drip line for larger root zones.
Hanging Baskets: Micro-spray or fogger emitters can be attached to overhead tubing, ensuring even coverage for suspended plants.
Properly customizing your drip system ensures every plant receives the optimal amount of water, reducing waste and maximizing growth.
Maintenance Tips for Long-Lasting Performance
A drip irrigation system is low-maintenance, but periodic checks keep it running smoothly year after year:
1. Flush the System: At least once per season, open end caps and flush the lines to remove sediment or debris. 2. Check for Clogs: Inspect emitters regularly. If flow slows or stops, remove emitters and soak them in vinegar or clean with a soft brush. 3. Watch for Leaks: Drip tubing is tough but can be damaged by shovels, pets, or UV exposure. Inspect lines and repair leaks with connectors or tubing patches. 4. Replace Filters: Filters prevent clogging, especially if your water source contains sediment. Clean or replace filters every few months. 5. Winterize: In cold climates, drain the system at the end of the season to prevent freezing damage.Regular upkeep can extend your system’s lifespan to 10 years or more, saving you money and hassle.
Final Thoughts on Installing a Drip Irrigation System
Installing a drip irrigation system is one of the smartest moves you can make for your garden and the environment. Not only does it save water—sometimes up to 50% compared to sprinklers—but it also streamlines your gardening routine, reduces weed growth, and promotes healthier plants. With thoughtful planning, careful installation, and simple maintenance, even beginners can enjoy the rewards of a thriving, efficient garden. Whether you’re growing vegetables, nurturing flowers, or tending to a lush landscape, drip irrigation delivers the results you want with less effort and less waste.